Translogic Install, Round II

February 27th, 2007

Today’s update… lots of pictures.

I disassembled all the components last night as I was happy with how the final assembly was functioning.

After cleaning all the braised joints up on the parts and frame with a wire wheel I laid down a couple coats of high temp chip resistant epoxy paint. I also took this chance to clean up all the old fastners on the wire wheel to make them sparkle.

When I got home today I threw the smaller painted parts in the oven on 200 for 20 minutes to bake on the paint. The fresh paint on the frame was given similar treatment with my heat gun for about 20 minutes then cooled down with my air compressor.

Here’s how the bellcrank and spacers turned out after paint.

And here’s the bellcrank with the bearings pressed in place.

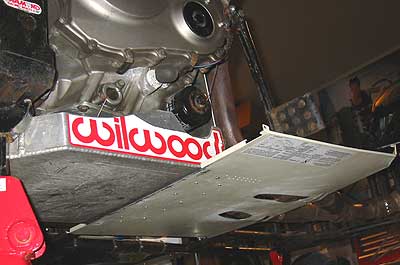
And here’s the bellcrank and spacers mounted up in place with the new hardware. Lots of last years gunk to clean off the engine and frame yet before race season.

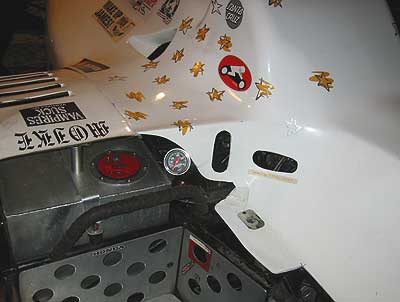
Here’s how the top mount for the translogic turned out once I’d cleaned up the braised joints and painted the frame. Shame is now I have a shiny clean spot on my battle worn frame.

First impressions: It’s very light. I’d say a pound at the most. The outer case is all spun aluminum. I resisted temptation to open it up and see how the guts worked.

It’s considerably lighter than the linkages, old bellcrank, and toebox shifter assembly that were removed. So I guess that means I can have that extra slice of bacon with breakfast.

From my playing with it, if the engine is running… it -always- changes gears, no matter what. I’ve yet to be able to get it to false neutral or miss a shift so far with bench testing. But that proves nothing, we won’t know for sure till we get it out on some asphalt and I can dial it in with some load on the transmission.

If the engine isn’t running it will still shift, but you gotta wiggle the countershaft sprocket a bit to get the transmission to pop into the next gear before it will shift again.

But, if the engine is off, it will go from neutral to first, or from neutral to second… and back to netural from either engaged gear flawlessly with just a dab of the button. That alone beats the hell out of crawling headfirst into the F1 body to try and wiggle the toebox shifter with my hand to get the bike into neutral to move it, or into gear to keep it parked.

I can understand why the system costs nearly 1400 bucks.

Translogic Install, Round I

February 25th, 2007

Started the install/fab for the auto shifter today. Lots of sitting around and scratching my head, just staring at parts and sipping coffee. Eventually something clicked and I took off like a rocket with a wild idea. I didn’t even sketch things out first this time.

I had to fabricate and braise up my own brackets, as well as make my own ball-bearing supported bellcrank, linkages, and spacers for the shift assembly. I think the only thing I didn’t make or design myself was the stock Honda shift arm that goes on the engine output shift shaft, and the Translogic unit itself.

Mr. UPS Arrived Today

February 16th, 2007

Euro GP-Spec full-auto shifter hotness with two programmable black box brains that rival the stuff getting the shuttle in the air. http://www.translogicuk.com/ for amazingly sexy but wallet denting toys. And big thanks to the guys over at http://www.ema-usa.com/ in Pleasanton for the hook up. Eric, you rule!

The Penske has arrived

January 28th, 2007

Marra called from Aftershocks to let me know the Penske had arrived today…

For comparison here’s the old blown Sachs rear shock off the CSR it’s replacing. Phil took a crack at it, but said he couldn’t see an easy way of getting it apart to replace the seals. So BCR opted to go with a new unit, suspension is never money wasted in my book.

And the 100% custom fabricated hand-tooled Penske Axis shock with lots of knobs and dials that give a very satisfying ‘click’ when turned… All of which is rebuilable, rechargeable, and fully serviceable. And of course a fresh 300lb Hyperpro spring in a fetching blue.

Phil at Aftershocks was even nice enough to cut my spacers down for me so the new unit would bolt right up with no issues. Thanks Phil! And of course, since the rear shock is such a simple install, I rushed right out and dropped it on the CSR to see how it’d look.

Fiberglass Mayhem

January 22nd, 2007

I’m building a new heat shield / toeboard / floorpan / footpeg mount for Sarah out of fiberglass. I’m ok with composites, but I wouldn’t call myself an expert by any means.

I’m Johnny Knoxville, and this is Duct Tape Layup…

Here’s what I’ve got to work with. A bit of sheetmetal I’ve clearanced around the bottom of the exhaust and glued to the bottom of the oil catch pan. And some sheetmetal that covers the headers to keep the heat off the ass of the driver. Very crude and very heavy. Not to mention very ghetto. And we’re trying to move away from the appearance of backyard engineering and the hammer as the primary tool in modern F1 rig craftsmanship.

So we yank off the brake pedal and shift linkage (shift linkage and toe shift box getting tossed anyway since the Translogic is going in) and bust out two rolls of duct tape. And we lay layers and layers and layers of tape till we’ve built up a nice thick base over the headers and platform as evenly as possible.

Then we bust out the 3M Super 77 spray adhesive and the Aluminum Foil. Laying down the foil is a simple task of a spritz of spray glue and smoothing out the foil. The foil acts as a non-stick peel layer between our glass/resin and the tape.

And then finally we bust out our 6oz cloth and dice it up into bits. More Super 77 to tack it into place, and we lay down layers of 6oz cloth till we realize we don’t have enough to finish what we want to do. I ran out and picked up more 6oz cloth and some heavy mat today. The advantages of living in a surfing mecca. So it was time to get back to work.

I finished cutting up the rest of my layers and tacking them in place with Super 77. It’s smoother than it looks, that’s the wrinkly aluminum foil showing through about six contrasting layers of glass cloth.

I then mixed up 10 oz of my blue laminating goo using enough kicker to give me about an hour of working time. After that it was about 45 minutes careful work with a 1 inch standard brush cut smooth with shears and a plastic spreader to get the goo through all the layers and work out the air pockets. Not perfect, but since I’m just going for something to mold the shape I’ve formed with the duct tape it’s not mission critical it be perfect.

And after a few days left in place to cure, it pops right off with some polite poking with plastic spreaders and a rubber mallet. I’m left with a very nice base mold with only a bit of stray foil to peel away in spots.

And this is with all the tape and bracing removed from the pipes, you’d never know any of it was there to begin with.


And the new un-trimmed part popped on just for a quick test fit.

Now mind you faithful reader, all of this work was just to make a mold. Once the -real- composite part is finished I’ll line the underside of it with heat resistant foil/mat to protect it. Dig this product from the guys over at thermotech:

http://www.thermotec.com/products/full/14100/14100.html

That’s all on this for now… More on it once I decide I can put up with another couple weeks of fiberglass itchys.

2007 Season Approaches

January 15th, 2007

Tons of updates. The CSR is stripped down in the garage with lots of it’s guts hanging off at odd angles. Some major overhaul and updates are going in place before the 2007 season starts so we can hit the track with the F1 purring like a kitten.

Here’s the latest schedule from the SRA-West website.

2006 Superside America season is over

October 13th, 2006

The results are in for the 2006 Superside America Sidecar Championship… And we didn’t finish dead last. We can say we competed and ranked in a national circuit. As a point of interest, do run down the list of drivers and note just exactly the number of names that sound girl-like in nature.

Of course, hats off to Frank and Dennis on the big big win. I wish I could say I was there to see it happen but all I remember
is seeing a low flying blue cruise missle shoot by us several times.

We’d like to thank our sponsors, friends, and SRA family. And we’ll see you in April for ’07. See if we can’t cut that top 30 down to a top 15.


Small Update…

September 18th, 2006

Two quick things.  Finished the bracket to hold the water temp gauge in position in the passenger compartment.  It turned out pretty well.  Just used a black powdercoated bracket I had set aside from a pair of foglamps.  A bit of modifying and it fit right up.  I foam mounted the gauge and dressed the cabling and wiring harness again.

And I hopped in the CSR after the body was on to see for myself how the finished toe skidplate felt.  It’s perfect.  It keeps your feet in ideal height position relative to the shifter and brake pedal.  It also allows you to relax and not strain your quads holding your free-floating feet away from the controls.  Here’s the best shot I can get of what the toe skidplate looks like from inside the cockpit.

MySpace Page…

September 14th, 2006

Set up a MySpace page today.  What a terrible experience.  It’s not designed for anybody with any real coding or manipulation skills.  But I guess when you cater to the lowest common denominator you have to nerf the hell out of everything or you’d need a technical support center the size of Alaska.

http://www.myspace.com/badcatracing

I’ll write a bit of glue that will take the updates from this 1and1 blog interface, which I prefer to use… and inject them into the MySpace blog in a hands off fashion.  Shouldn’t be too difficult.  (Shrug)  MySpace is supposedly generating more visits and traffic than anything else out on the interweb, so it makes sense to set up an account and start trying to garner some sponsorship that way.

I hit up Barry at Staircase Tattoo.  Hopefully I’ll hear something back.  It seems that tattoo shops and sidecar teams go hand in hand from what I can tell.  I think Barry will be into it. 

Skidplate Fabrication

September 8th, 2006

  At Fernley Sarah and I noticed that the foot controls are low enough that your toes scrape the track at times under full suspension load over bumps, or if you’re a bit sloppy with your footwork.  I’ve noticed that most rigs have skidplates that keep the drivers feet off the asphalt.  And something Jean-Guy said stuck in my head. “If you go off the track, lift your feet up.”  In my head the only thing I could see is Sarah’s foot getting sucked under the brake pedal and every bone in her foot and ankle getting broken, if not worse.

 So I fabricated a skidplate out of a spare bit of sheetmetal I had from a UPS case.  It is riveted and glued to the bottom of the oil catch pan, and secured at the front by three hose clamps at two points on the headers and one point on the frame.  I clearanced it nicely around the low points on the header downtubes to keep the sheetmetal flat.  The sheetmetal has a nice rounded edge along the front and back so there’s not much chance it will snag on anything.  We dropped the body on the chassis and had Sarah jump in to check the fit. Everything looks good.

 Hopefully this will allow her to worry less about keeping her toes up and focus more on her driving.  Once the glue is all set up I’ll sand the skidplate and catch pan, and hit the whole assembly with a few coats of flat high-temp black enamel.