Archive for April, 2007

Sponsors rule

Wednesday, April 25th, 2007

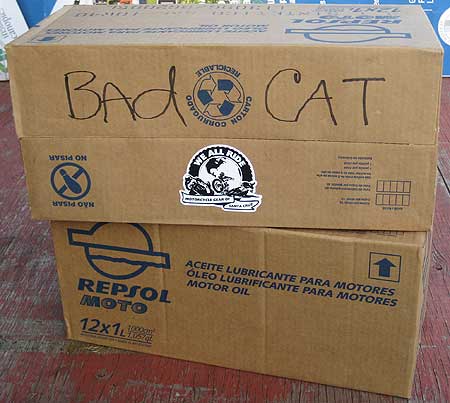
Joaquin w/Repsol dropped off the cases of oil today for the rig. Pouring the oil in the engine was the very last thing that needed to be done to finish the prep of the CSR. Thanks Joaquin, THANK YOU REPSOL! And thank you Jocelyn and the crew at We All Ride! All of you make my season possible.

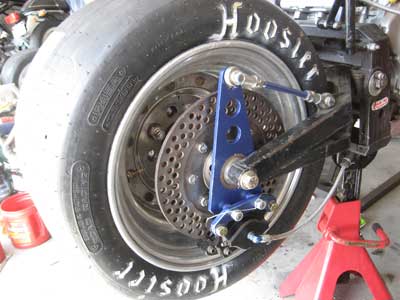
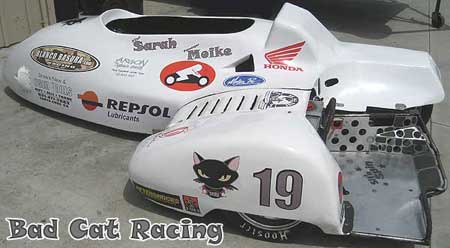
Mike got the rig up to operating temprature after that to cycle in the new plugs and oil. He checked the coolant levels with the engine hot, bupred the extra air out of the system, and then safety wired the radiator cap shut. Stick a fork in it, it’s done. Blanco Basura stopped by and finished up the decals, and now the F1 looks professional, almost like we actually know what we’re doing. Blanco worked their asses off into the night getting the vinyl cut for the rig, and we can never thank them enough. I hope I pull a good finish Saturday and Sunday to make you proud!


~Sarah

OMG Shoes

Tuesday, April 24th, 2007

Shoes finally showed up today via UPS for Mike at the last possible minute.  We were suprised to learn that they did in fact fit and would not be repackaged and sent off into the inner-working of Generic Delivery Service to some how get exchanged.  They even came in a very intimidating box, inside of a big box.

But what came out of this box of organic death was something almost clown like.

And those are the simple little shoes Moike’s going to trust his ankles and feet to this season.  They fit him like they were made for him, and they do come from Oakley’s racing division.  So they’re waterproof, flame resistant, puncture proof, abrasion resistant, and meet all the high end standards like FIA 8856 and 2000.  As far as Mike knows that could mean the boots will fend off custard stains.  He just thinks they look snazzy and will be much easier to use on the platform than his bulky Daytona Winners.  Willow Springs will tell.

New Suit, New Gloves, Fiberglass…

Saturday, April 14th, 2007

I stopped by Helimot today and got measured for my new leathers. I’ll be going with a modified ‘Victoria’ style suit with my nickname, sponsorship logos, and the BCR logos across the back and chest. Mike also picked up a new pair of the kevlar F-108’s for passenger work as his bulky Held gloves are about five years old now and held together with gaffers tape. He says the F-108’s are amazingly flexible provide excellent tactile feedback through the thin skin.

Mike also finished up the heat shield/floorboard for the CSR yesterday. it’s got about five layers of 10oz fiberglass mat on top the base mold he made during the original layup to get the shape. It’s not perfect, but it’d probably stop a bullet. Sanded and painted it looks reasonable, all that remains is to pop rivet the Thermo-Tec heat shielding to the underside to protect it from the heat thrown off by the exhaust headers.

Attack of the Chain Tool

Wednesday, April 11th, 2007

One of the requirements of Superside is that the primary drive chain be secured with a rivet type masterlink. Mike doesn’t like these, says it’s a PITA to make fast gearing changes, and he’s never had a problem racing solos with clip masterlinks secured with RTV silicone. But, rules are rules. Our normal chain breaker works great for use on standard streetbikes, but just won’t cut it with the monster chain required to put the power to the ground from the CBR1000RR motor to the 10 inch wide Hoosier slick behind it. So we called up Chris at Motion Pro and told him to send us the biggest chain breaker they had.

Here’s a comparison shot of what arrived in the mail.

On the left is our new chain tool with all the four stake rivet tips and other sundry attachments. On the right is our normal chain tool. You could kill someone, or a whole crowd with the Motion Pro Great Wacking Huge chain breaker. I think they machine them from actual leftover scrap from Patton tanks.

Here’s how well it stake rivets a master link, with little to no effort required with a 1/2 inch drive socket wrench.

It makes a factory looking rivet link in less than two minutes. And should you be attacked by a wild boar, it can be used to bludgeon the animal senseless without even scratching the high quality finish.
Thanks go out to Chris at Motion Pro for supplying us with such a high quality tool!

Nude and off the stands…

Wednesday, April 11th, 2007

Mike says the F1 is about 90% done at this point. We’ve got a few small projects to finish, but there’s a comfortable window of time to wrap things up at this point. Last minute negotiations with new sponsors for 2007 go well, and more people are coming on board to support us this season. Here’s the CSR actually on it’s new rubber and out in the sun for the first time in months. All that time with the heat gun and scraper getting the old vinyl decals off was not fun at all. When it came to all the stars I actually called in the pledges for our motorcycle club and had them finish the job.

It’s ready to head over to Blanco Basura and let the team over there work their magic with the graphics.


IKEA wheel balancer?

Thursday, April 5th, 2007

Some of you have e-mailed me asking, “What do you mean, you made a wheel balancer out of a coffee table?”. I mean literally that. I welded up a static wheel balancer out of an IKEA coffee table I got tired of tripping over in the garage. A static wheel balancer is a really simple machine, and anybody with basic tools could build one for under 30 bucks. MotoGP teams trust them, so I think it’s perfectly fine for our applications. It’s just a stand that holds a pair of sealed bearings on either side that will hold a wheel axle or rod level and allow stiction free rotation of a rim/tire combination for balancing purposes. You lightly spin the wheel, the heavy spot sinks to the bottom, you mark the top of the tire with a grease pen, and take a guess at how much weight to stick on at that point. When the wheel settles at random and does not ‘sink’ to a heavy spot, it’s balanced with the proper amount of weight. It’s simple and easy to do.

If people really want me to post construction diagrams up I will, but honestly… I really don’t think that’s nessasary. Go to any skateboard shop, buy a sleeve of cheap skateboard wheel bearings for 10 bucks, and weld up a couple A frames and braces.

Start with one crappy coffee table with a busted glass top…

Some Skateboard Wheel Bearings…

And end up with this…

Translogic test run

Wednesday, April 4th, 2007

Got everything buttoned up on the translogic wiring yesterday. It’s quite nearly a plug-and-play installation. Deciding where to mount the QS and ECU black boxes probably took the most time. Once I got everything wired it was down to my favorite part… dressing the harness and taping everything up tidy. The presentation is now very pleasing to the eye.

And here’s some video of a test run…

http://www.youtube.com/watch?v=u7gCGJ8ncgw

Back end is done…

Tuesday, April 3rd, 2007

So finally, the put-the-power-down side of the CSR is done, assembled, and wired. Everything went smooth. Bearings are flawless, the new axle fits perfectly, all the new hardware is just the right size. All the bolts and nuts drilled in the jig without snapping one carbide bit, I managed to not gouge myself with safety wire once. I did teach Sarah how to mount a tire and static balance a wheel with the static balancer I welded up out of an ikea coffee table and ten bucks worth of skateboard wheel bearings. She even got the hang of using my Motion Pro chaintool to break our new RK chain, install the master link, and use my Motion Pro alignment tool to true the rear wheel alignment by tweaking the concentric adjusters on the swingarm pivot till things lined up perfect. She catches on fast in the garage and I rarely have to explan the technical aspect of something more than once. But she still says, “I’m the driver, your the mechanic… I should be more concerned with racing.”