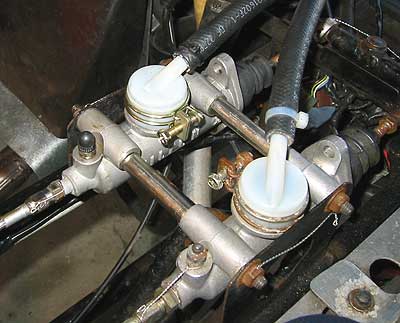
The parts came in for the Tilton master cylinder. So I spent Labor Day removing the temporary master cylinder reservoir I borrowed off the RGM and installing the new remote reservoir adapter. I was pleased with the E-Bay store Race Basics (http://stores.ebay.com/Race-Basics) I’ll be turning to them first when it comes to braking and other sundry components in the future.
Installation wasn’t a big deal. Cleaned out the Master cylinder, and blew the connecting hose and remote reservoir clean with compressed air before I test fit everything. Once together I ziptied the hose ends and secured the nylon remote reservoir adapter with the new clamp I picked up as well. I wish I’d bought an extra clamp, as the one on the other master cylinder looks pretty furry.
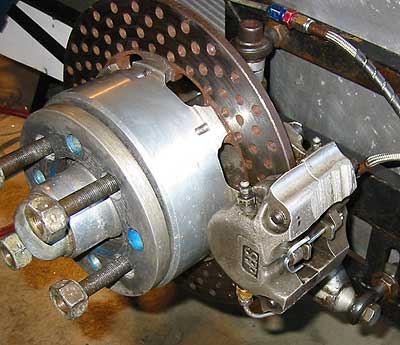
Once that was done I went ahead and started the process of bleeding the entire braking system. This is not an easy task. On race calipers each piston has it’s own bleeder. That’s four bleeders on each wilwood caliper, and two bleeders on the SRP caliper. Think about that the next time you’re whining about the three bleeders on your bike. The rear wheel isn’t too bad, as I can get to all four bleeders on the caliper with the caliper mounted. But the outboard wheel has to come off, and the front wheel has to come off and the wheel be removed from the hub/spindle assembly to allow full access to the wilwood caliper. I have a decent vac-bleeder so the actual bleeding job isn’t horrible. The first thing I noticed when I popped the outboard wheel off and really examining my SRP caliper is that it was mounted upside down. The bleeders were on the bottom, and the crossover tube was on top. It would be impossible to bleed all the air out of the caliper unless I took the caliper off and flipped it over while I was bleeding it. Now this would suck every single time I wanted to bleed the brakes. So the long term solution is to simply yank the bleeders from the bottom of the caliper, the crossover tube from the top, and swap them. This took some time and finess as things were, er… cemented in place by grit, dirt, and time. Lots of cleaning, a little heat, and very careful application of force got all the parts out in good condition. I blew out the inside of the caliper body with compressed air before reinstalling the bleeders and crossover tube with a bit of threebond on the threads. Once things were in place and the caliper was mounted and safety wired, I filled it with fluid using a neat jedi brake trick I learned helping Wade with his brakes at Fernley. Once that was done I ran 1.5 bottles of good DOT3 through the entire rear/outboard braking system to ensure no air anywhere at all and buttoned it up.
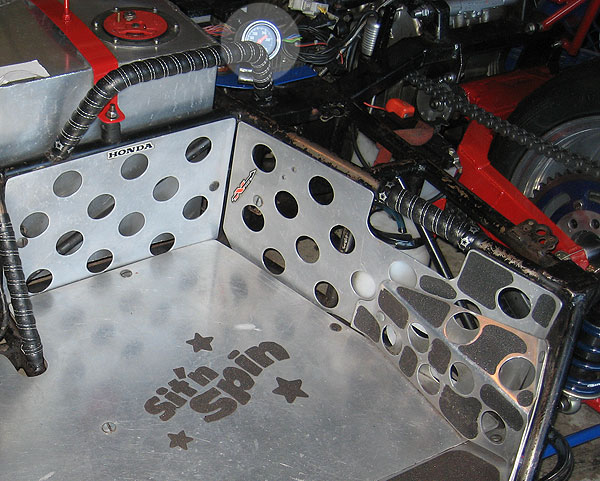
I finished with flushing and bleeding the front system, reassembling and safety wiring everything again. All mushyness is gone from the brake pedal now. I didn’t touch the balance bar or any of the bias on the master cylinders. If it’s not broke, don’t fix it. Since I had time left, I decided to yank the secondary AutoMeter water temp gauge from under the CBR1000RR dash in the drivers cockpit and relocate it to an area in the passenger compartment where I could see it. There is a working built-in temp gauge on the CBR1000RR dash, and Sarah is much more focused on keeping the rig on the road than she is the innerworkings of the powerplant behind her. It makes sense to assign that task to me. I couldn’t find anything in the rulebook that said no to having any indicatiors or gauges in the passenger compartment, so I mounted up the AutoMeter next to the low oil pressure ‘turnsignal’ indicator light. I fired the rig up and let it get to 160 to confirm both temp gauges were roughly in sync. The CBR1000RR stock temp gauge picks up in the engine, and the block runs about 6 to 10 degrees cooler initially since it takes awhile for all that metal to come up to operating temperature. The AutoMeter gauge shows a more accurate reading of the actual coolant temperature since it’s pickup is right in the filler reservoir assembly. I’m happy with this, and I’ll feel much more comfortable at the track knowing that now I have an estimate of what the engine health is.